Timelapse photography- Final shoot
- Dec 4, 2015
- 1 min read
As one of my units is image manipulation I wanted to experiment with moving image. I decided to create a time-lapse of my final shoot. I set up a GoPro camera to take photographs at regular images and used a combination of the GoPro editing software and iMovie. Below is my finished time-lapse piece.
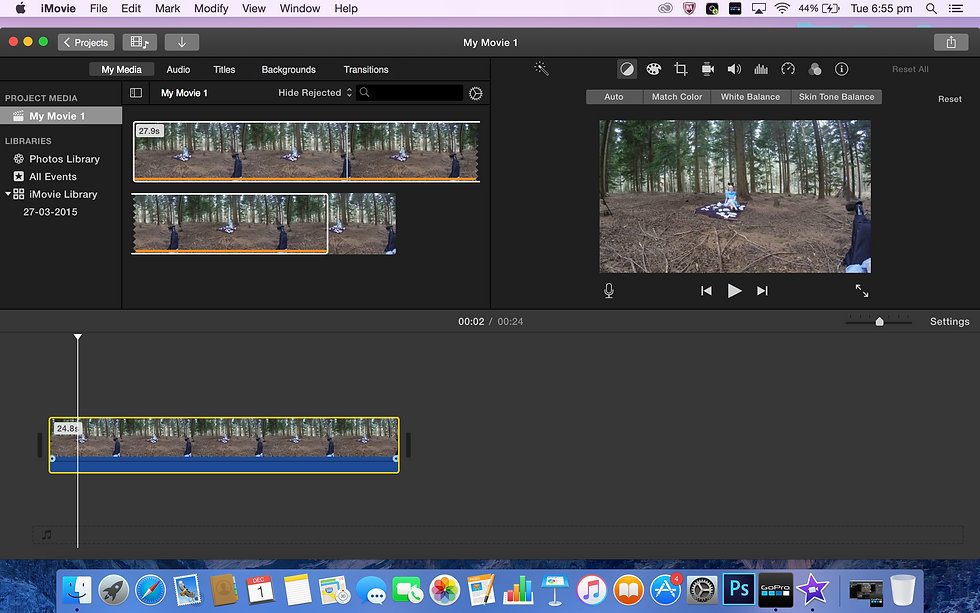
I have included screenshots of the process to document how I edited the footage together to produce the final video.

Step 1.Open GoPro editor and import new files

Step 2. Add files to conversion list

Step 3. Convert files

Step 4. Edit clips- trim, change colour balance, add colour filters

Step 5. Export file to edit in more advanced software

Step 6. Launch editing software

Step 7. Import footage

Step 8. Drag footage onto timeline

Step 9. Select audio (optional)

Step 10. Add audio to timeline

Step 11. Add title and ending

Step 11. Export final video when you.re finished

Step 12. Save final video
After importing the files into the GoPro editor I decided I wanted to refine and customise the footage further. I split some of the frames in order to cut out some unwanted shots. To help add some context to the video I also added audio in the form of forest sounds. To finish off I added an end title including my name.
I really enjoyed working with moving image and it's something I want to explore and experiment with further. It is the first time I have ever done anything like this so I don't have a lot of experience but I am very pleased with the outcome.


Comments